Few Simple Steps to Add a New Google Drive Account in the File ZIPO
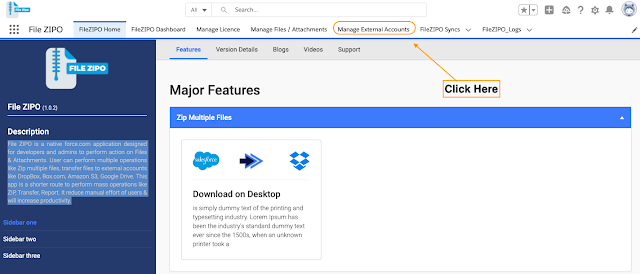
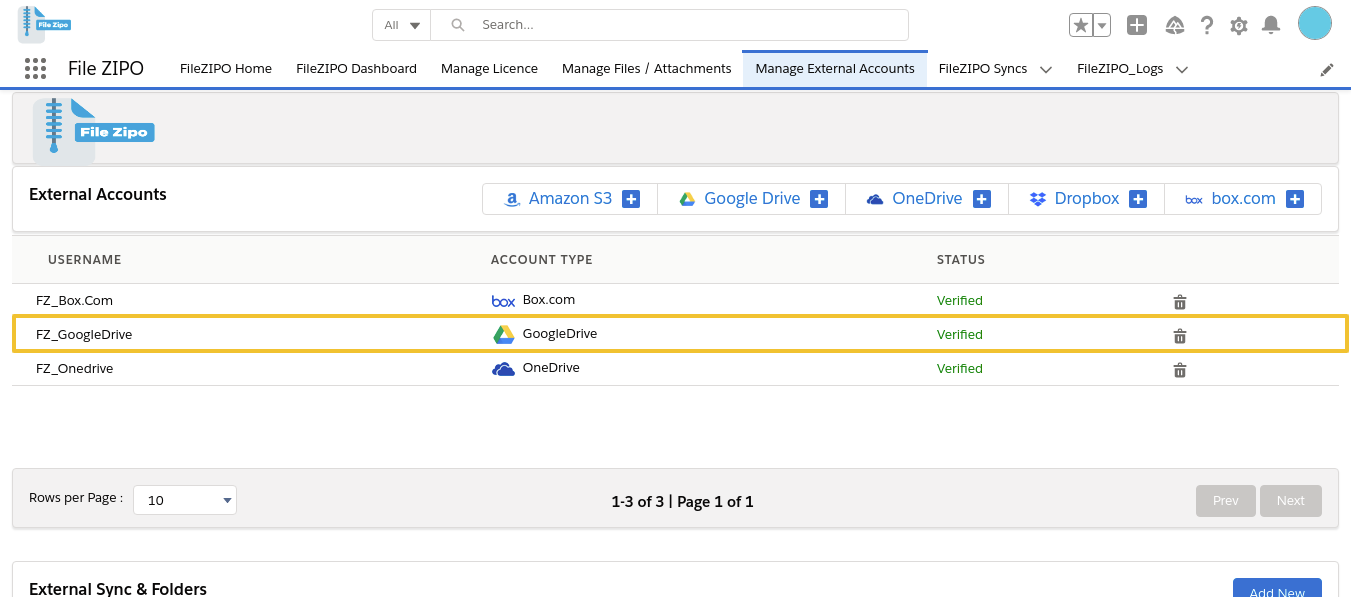
1. Open the FileZIPO application from App Launcher & Click on “Manage External Accounts” tab.
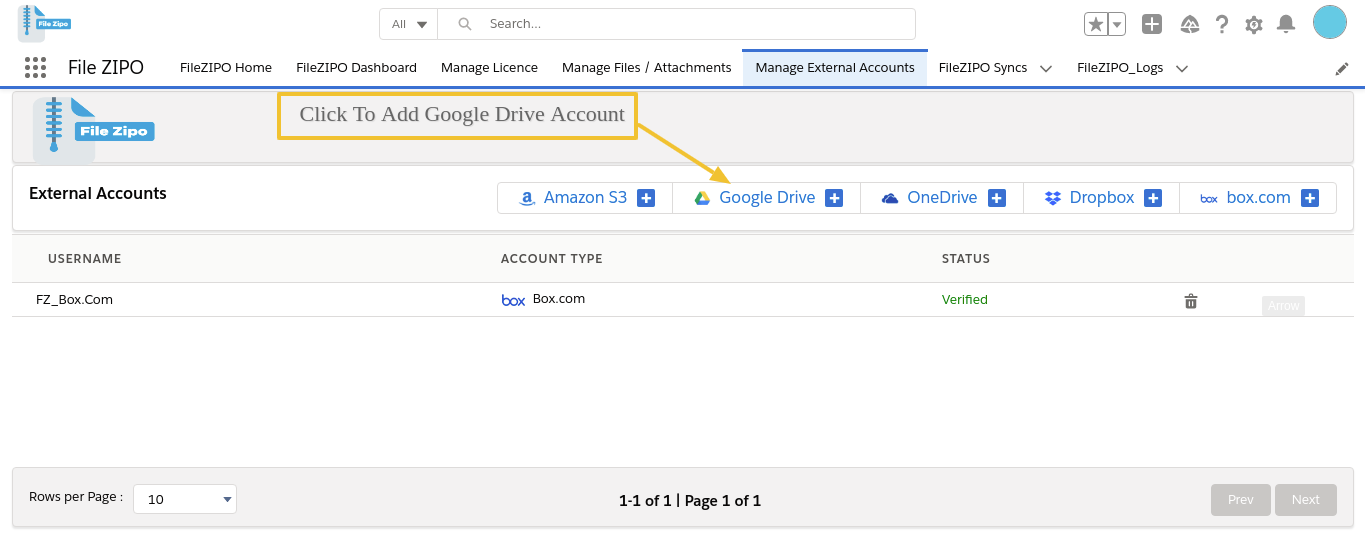
2. Click on Google Drive.
3. It will open below popup with instructions

4. Follow all the instructions defined in Step 1 to get the required details. Here is the detailed explanation for each step:
a. Open this Link Click Here
b. Login with your Google Drive (Gmail Account) username and password (if already logged in, please ignore this step).
c. Click on “Create Project”.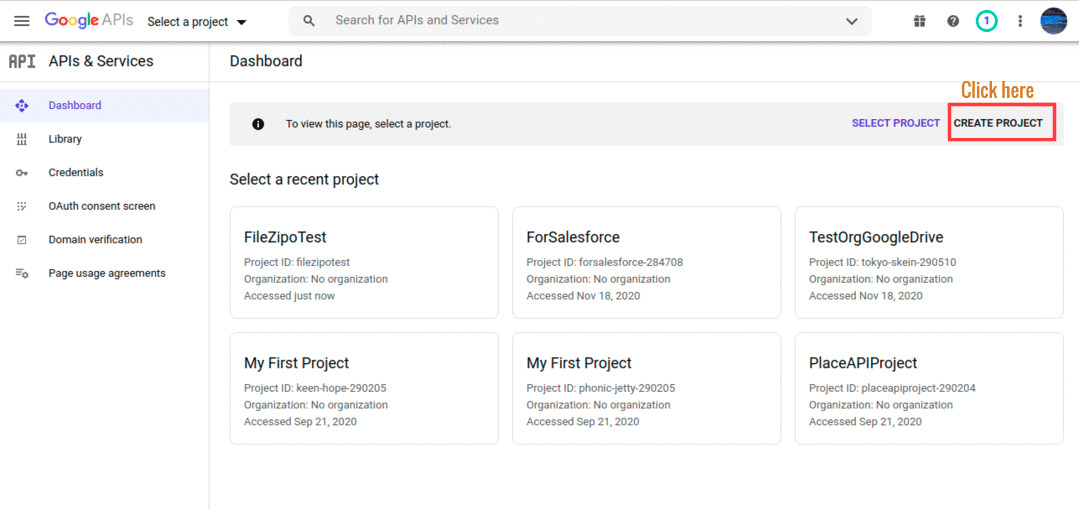
d. Enter Project Name & keep location as it is and Click “Create”.

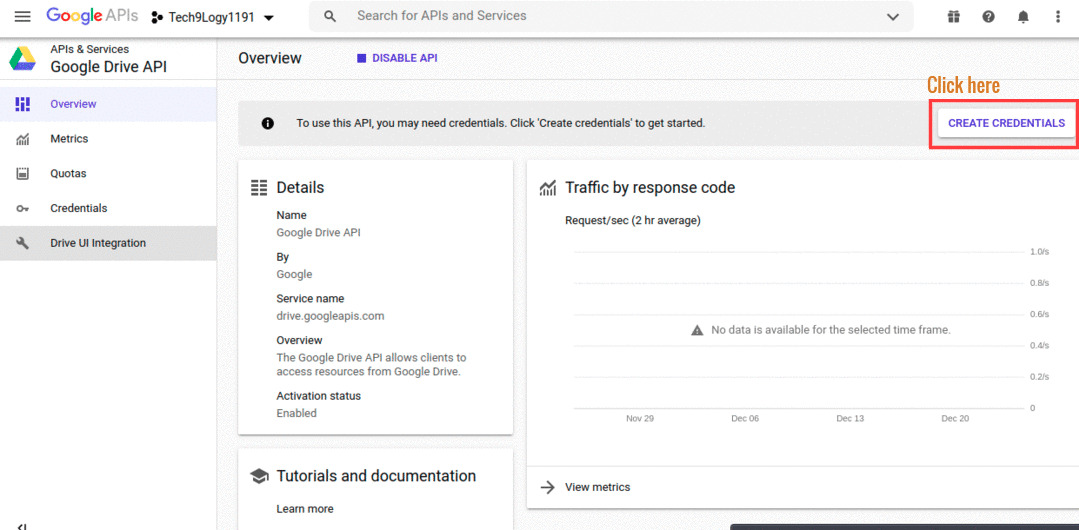
e. Goto API & Services > Library and Search “Google Drive API”, Open it and Click Enable (Skip this step if it is already enabled)
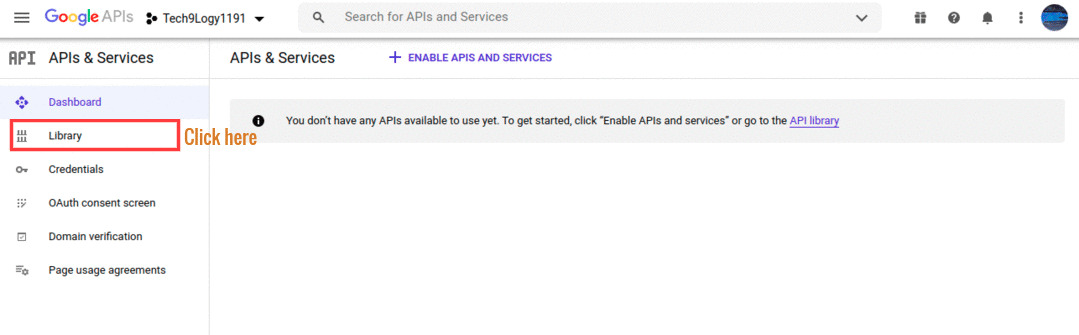
f. Goto API & Services > Credentials

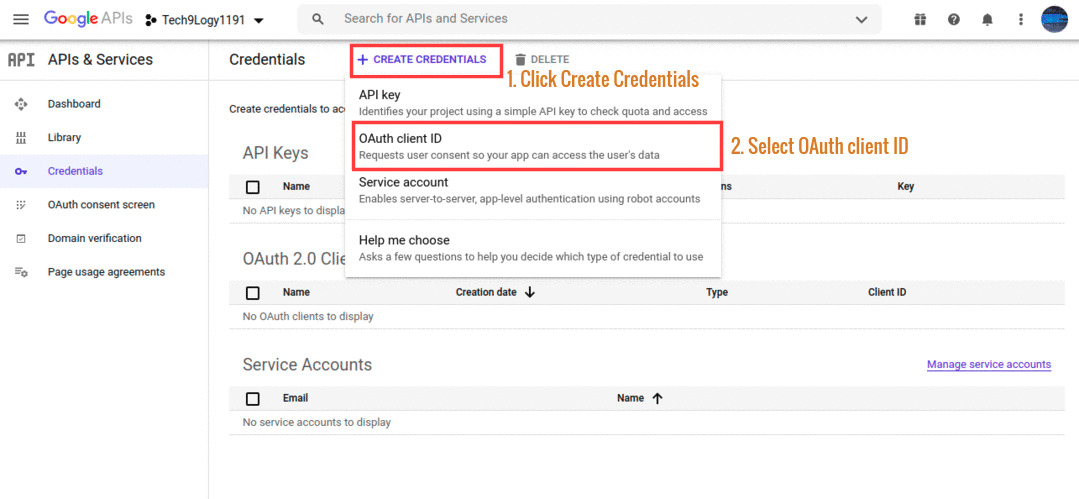
g. Click on “Create Credentials and Select “OAuth Client ID”
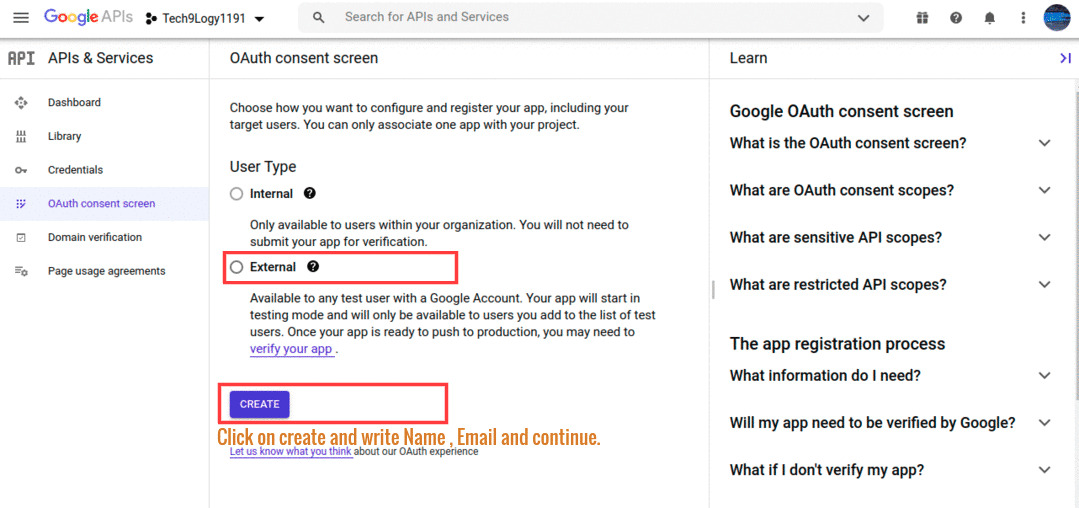
h. Skip this step if Consent is already filled up and jump to step “K” or Click on “Configure Consent Screen”, choose User Type as “External” and click “Create”, and Enter application name, and click Save.
i. Goto API & Services > Credentials and Click on “Create Credentials” and Select “OAuth Client ID”.
j. Choose application type as “Web Application”.

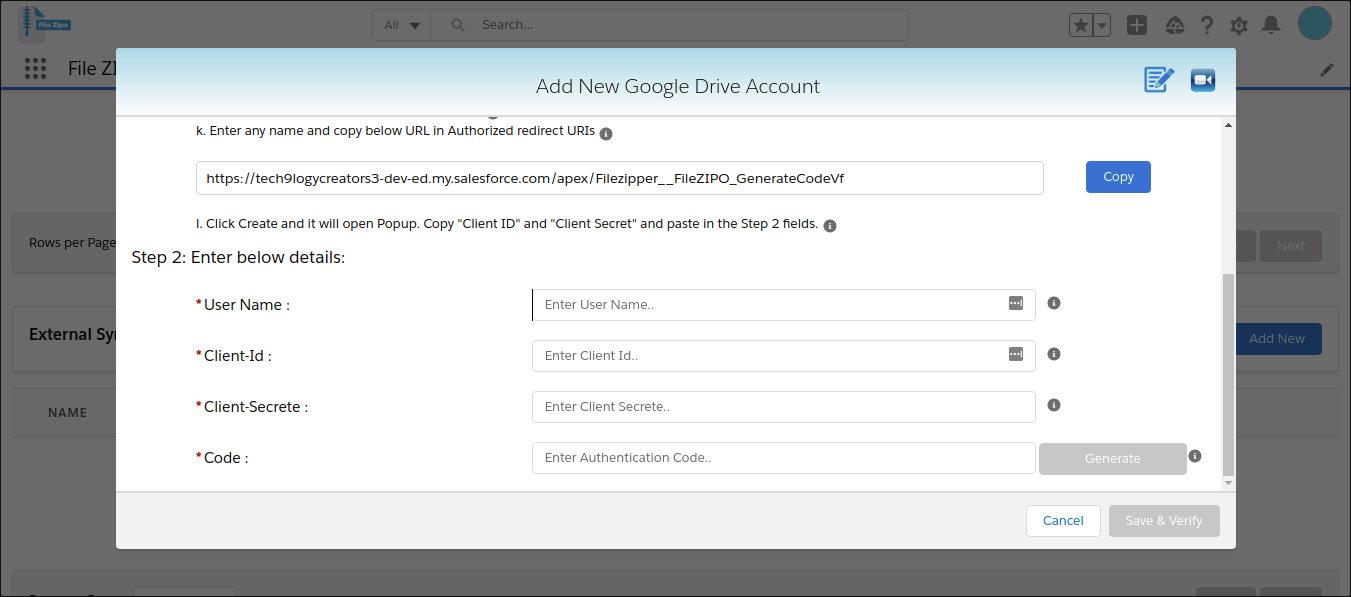
k. Enter any name and copy below URL in Authorized redirect URIs
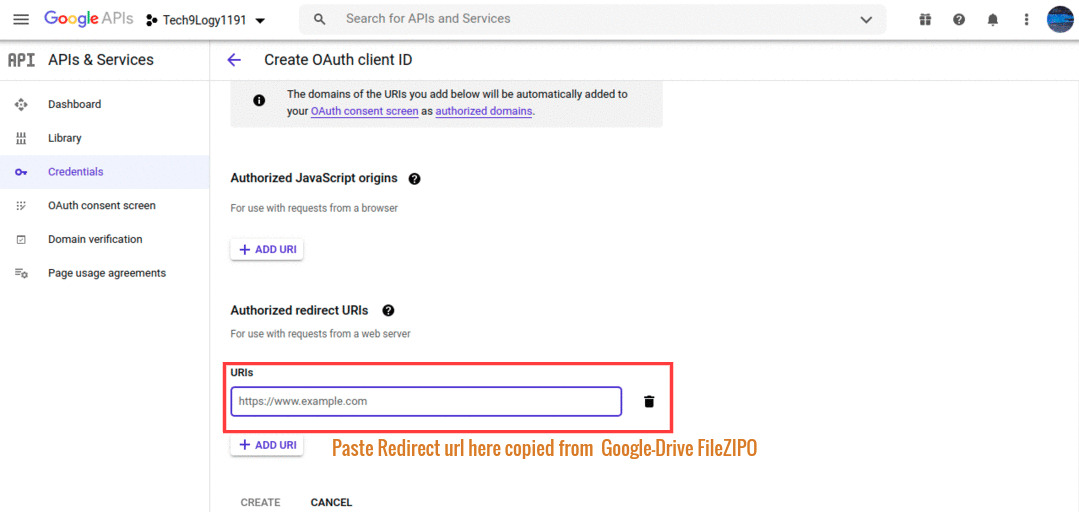
l. Click Create and it will open Popup. Copy “Client ID” and “Client Secret” and paste in the Step 2 fields.
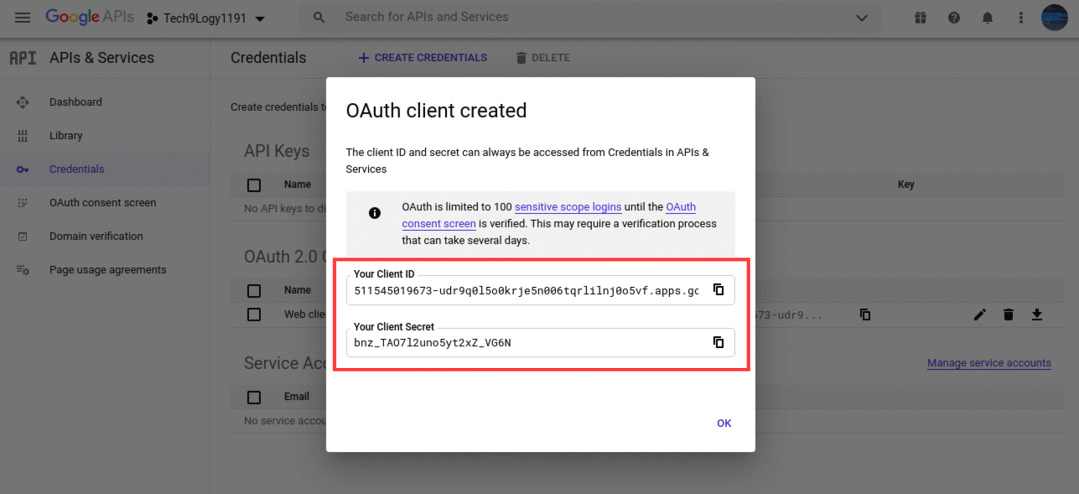
5. Enter your Google Drive username and Paste Client ID, Client Secrete in the respective fields of Step 2.
6. In order to generate “Code”, Click On “Generate” Button and it will open a new tab with below screen
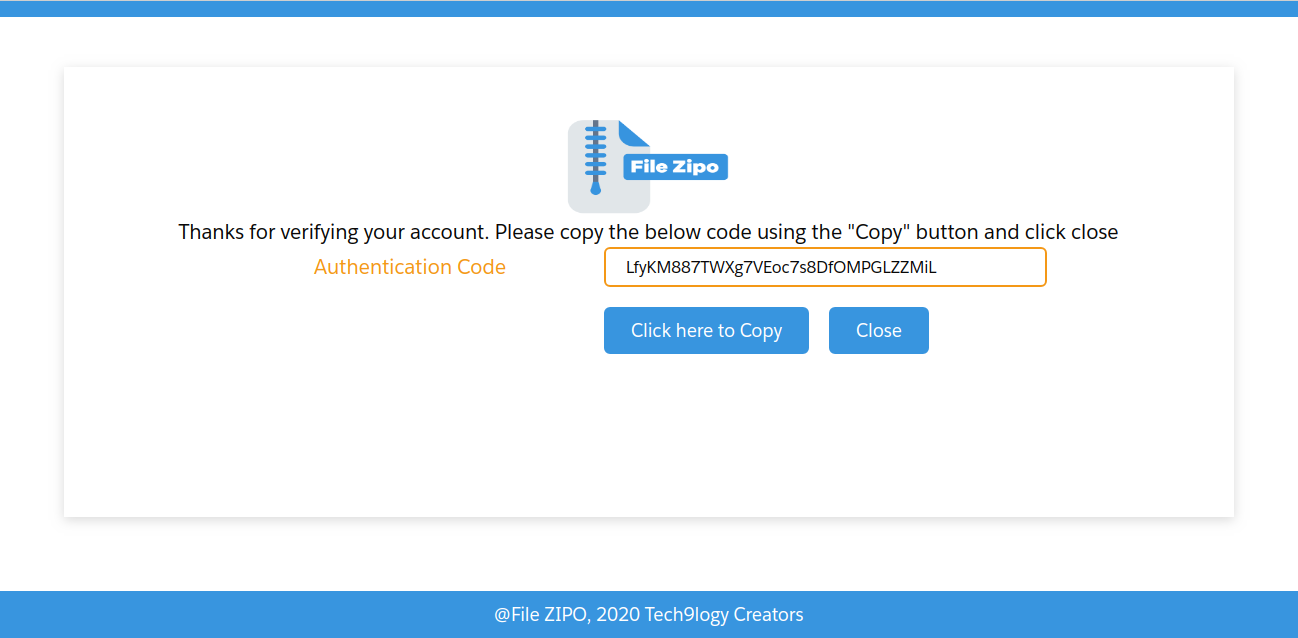
7. Copy the “Authentication Code” from above screen and paste in the “Code” field of Step 2 and then Click On “Save” Button.
8. Click Save & you are done. We are ready to save or transfer files from Salesforce to Google Drive or via versa.
***************************************************************************************************
Have you started using FileZIPO yet? Get this revolutionary application and make your Salesforce file storage effortless and pocket-friendly. Click here to install the latest version of FileZIPO application in your Salesforce instance & explore its complete benefits for you.
For any queries or suggestions, you can contact us at https://filezipo.io/#contact or mail us: support@ayansoftwares.com. Our File ZIPO Expert will help you get the best out of it.
We appreciate your valuable inputs.
This tool is available on Appexchange and Click on below button to install the
latest version of File ZIPO
Our other Salesforce Product