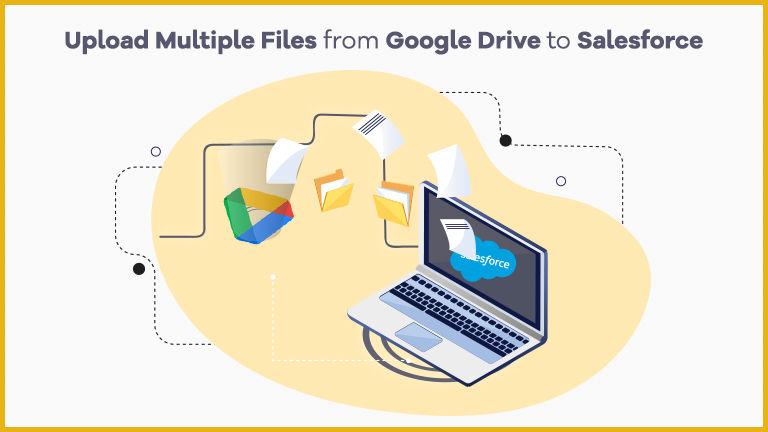
Few Simple Steps to upload/transfer files from Google Drive to Salesforce:
As Files or Attachments of Google Drive can be linked to particular record in Salesforce, so we need to add the FileZIPO component on the Detail page of the record as the first step and then transfer files from Google Drive to Salesforce.
Note: You can skip step 1-6 if the FileZIPO component is already added on your record detail page.
Scenario: I need to transfer or upload some files from my Google Drive to my Account record.
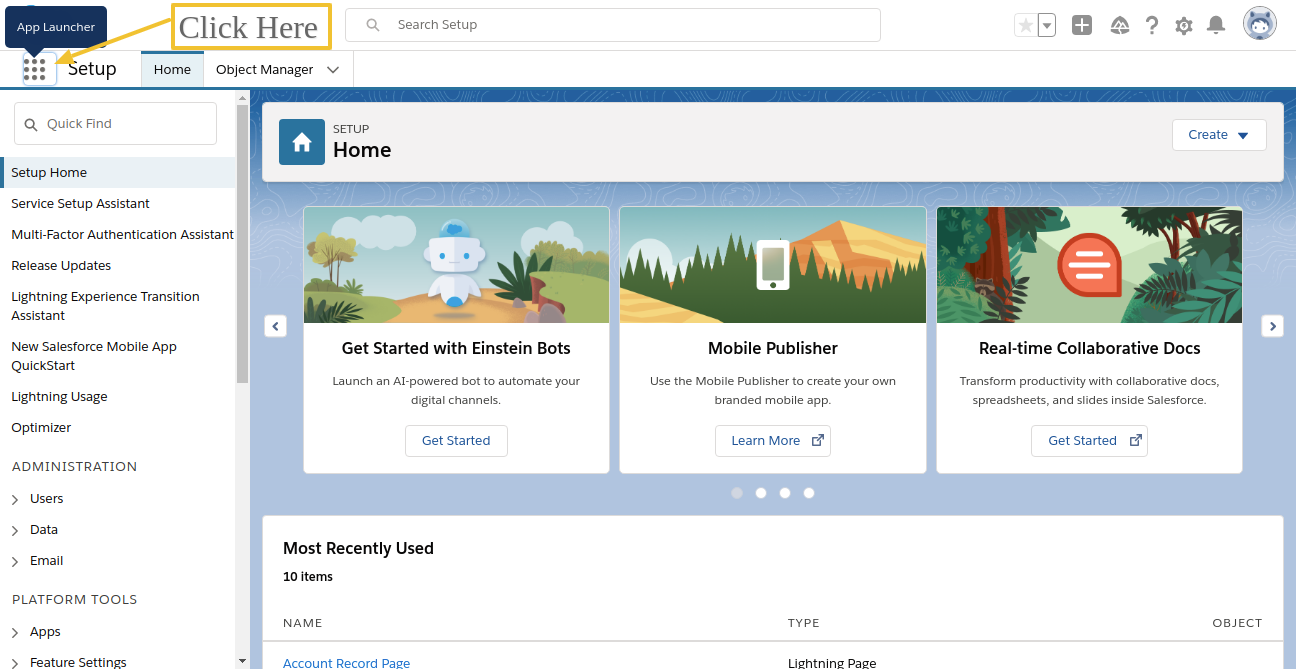
Step 1. Go to App Launcher like below image.
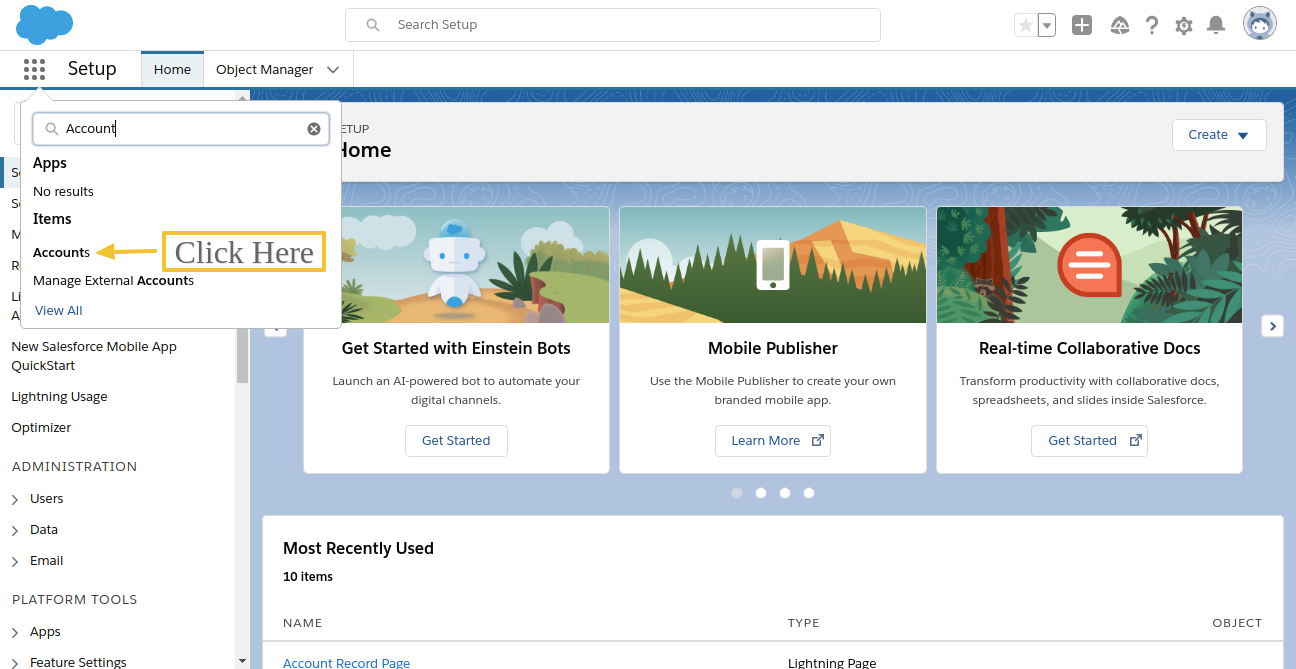
Step 2. Search any Standard or Custom object and click on the searched object. (Account object in this example).
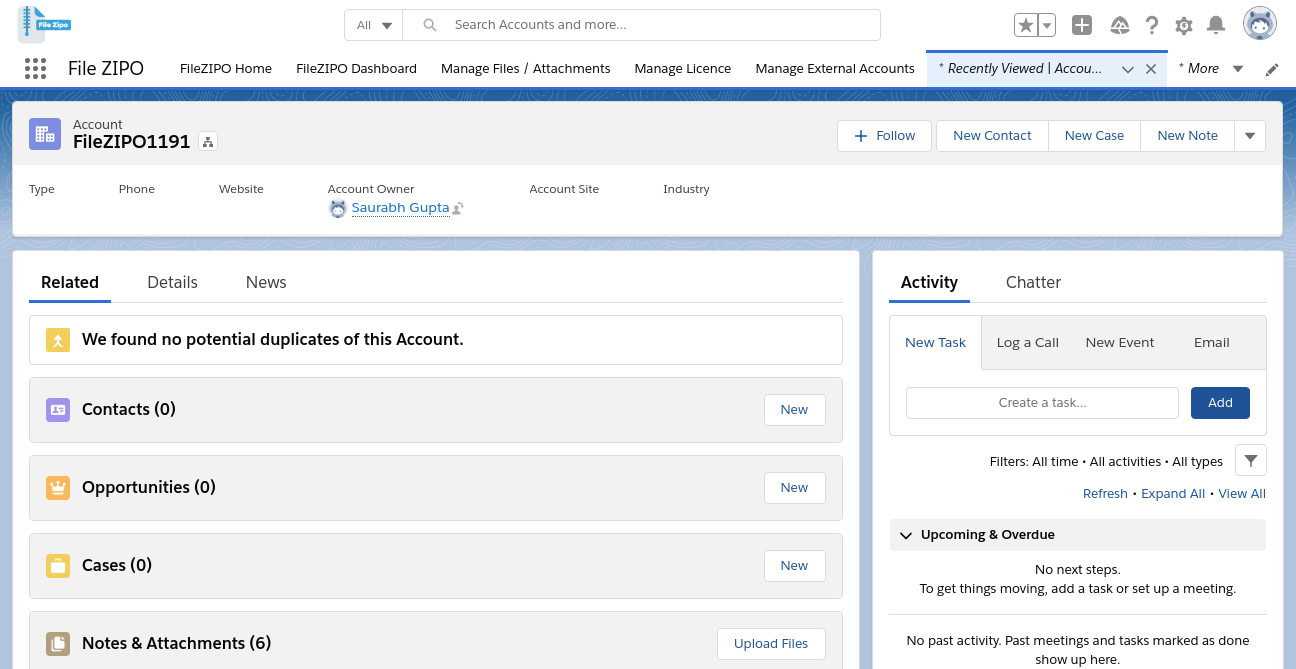
Step 3. Go to object record page by clicking on any record
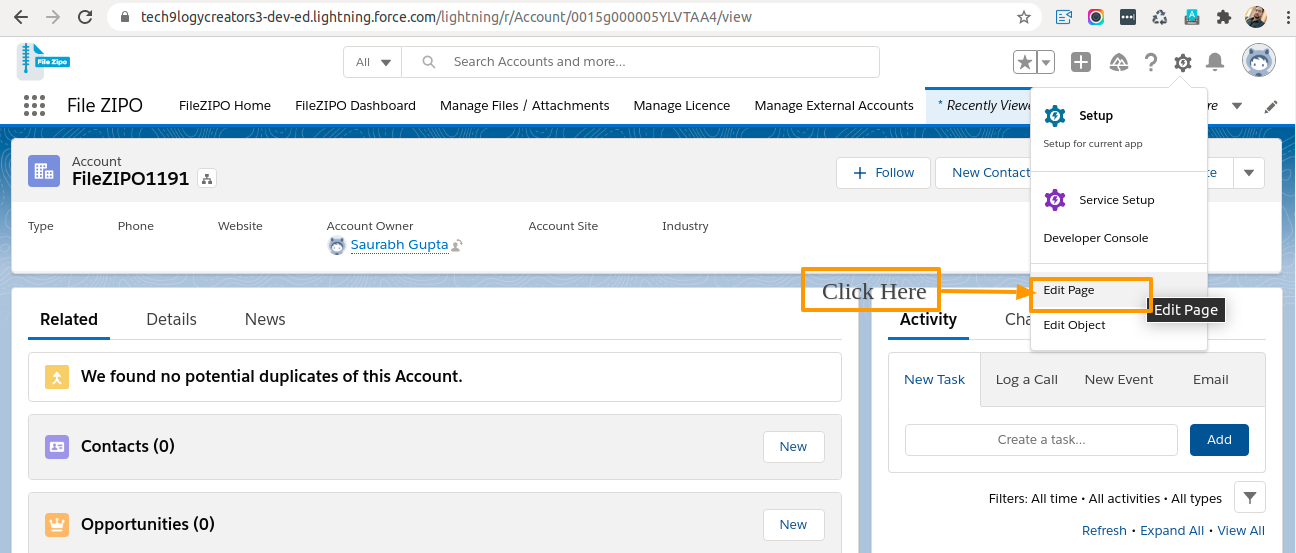
Step 4. Go To Gear Icon on the top right corner and click on “Edit Page”.
Step 5. Once “Edit Page” is clicked, it will open the App Builder page.
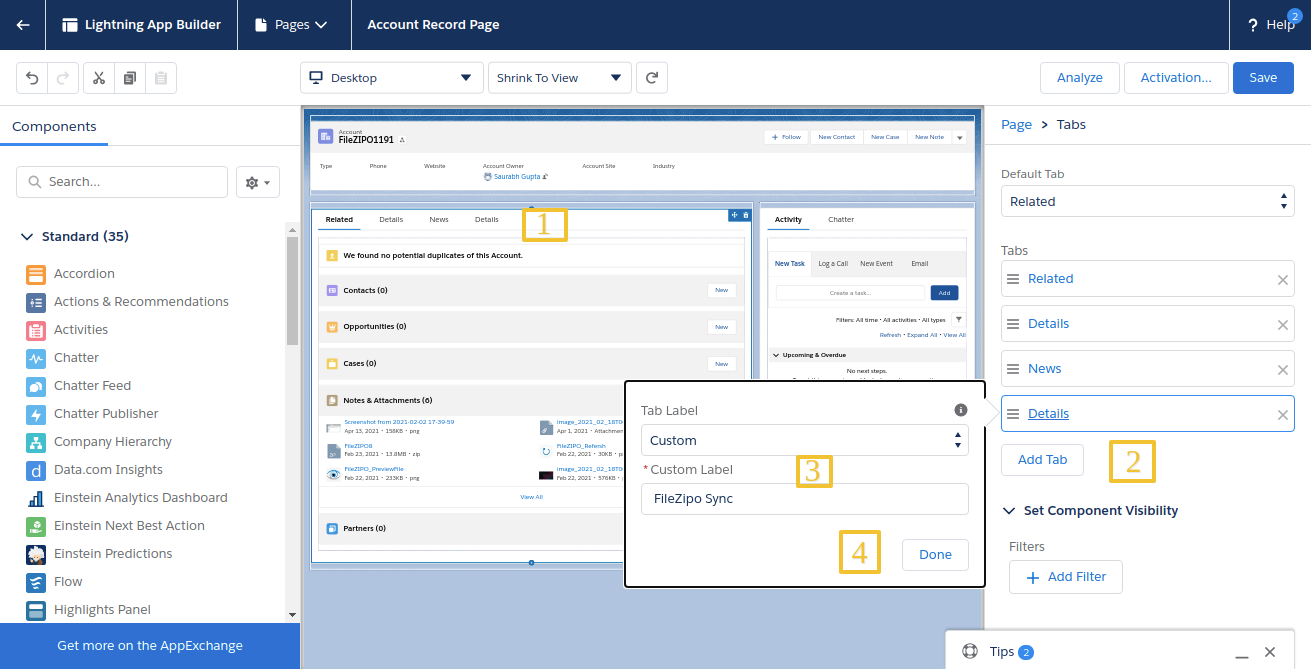
Above image has some features (each number has its description as below):
- Click on Tab section.
- Click on “Add Tab” button.
- Choose Tab label as “Custom” and enter name in “Custom label” as “File ZIPO”
- Click on “Done” Button to add tab.
Step 6. After adding tab, select the below component & drag the component to the newly added tab like below image.
Name of Component: FileZIPO_ManageExternalFiles
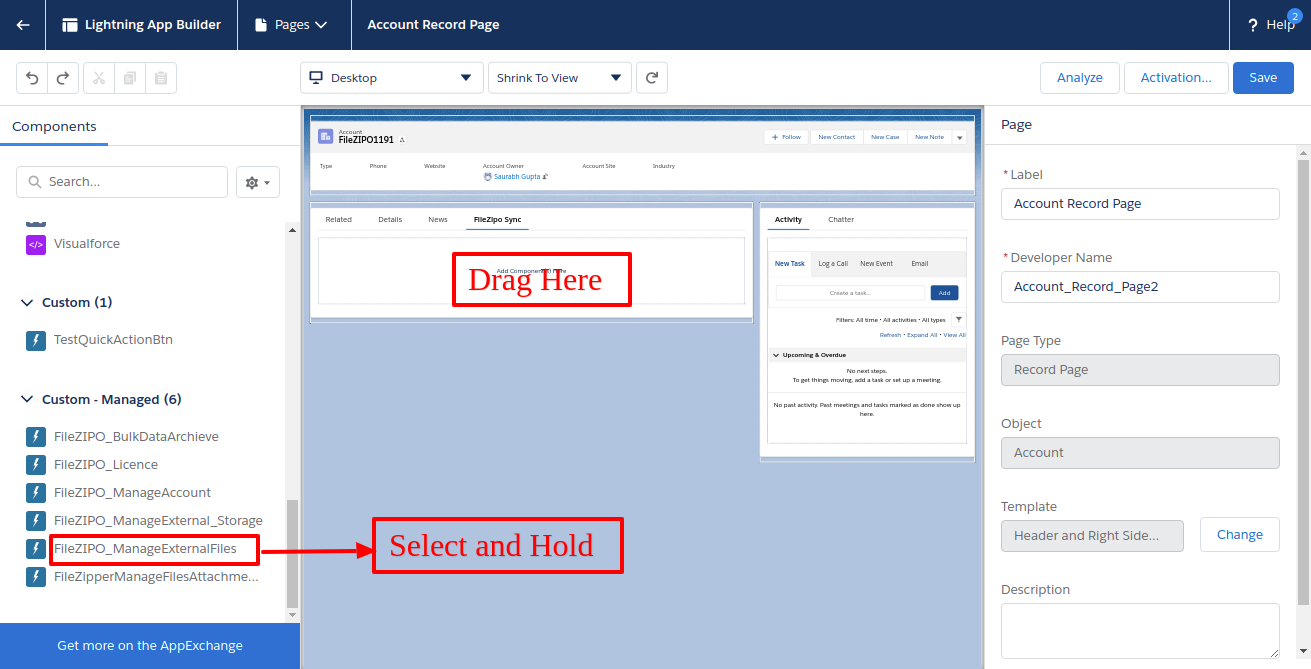
Click on Save and then Activate Button to add tab on detail page.
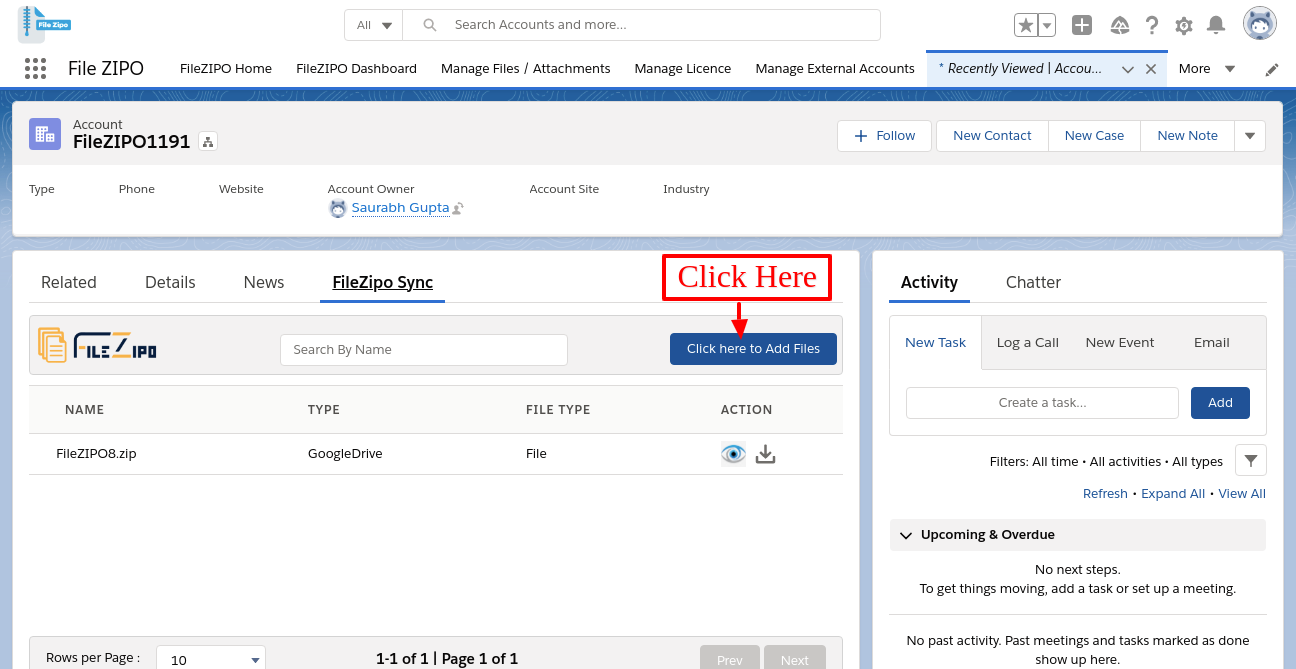
Step 7. Click on “Click Here to Add Files” button
Step 8. Once “Click Here to Add Files” button is clicked, it will display the popup as shown in below image

Above image has some features (each number has its description as below):
- Choose the option as “Google Drive”.
- Select Google Drive Account from the Drop Down.
- Choose File or Attachment (as an option) to upload in Salesforce.
- Click “Select Existing File” button to select existing Files/Attachments from Google Drive account.
Once “Select Existing File” button is clicked, it will open a popup screen like below image.
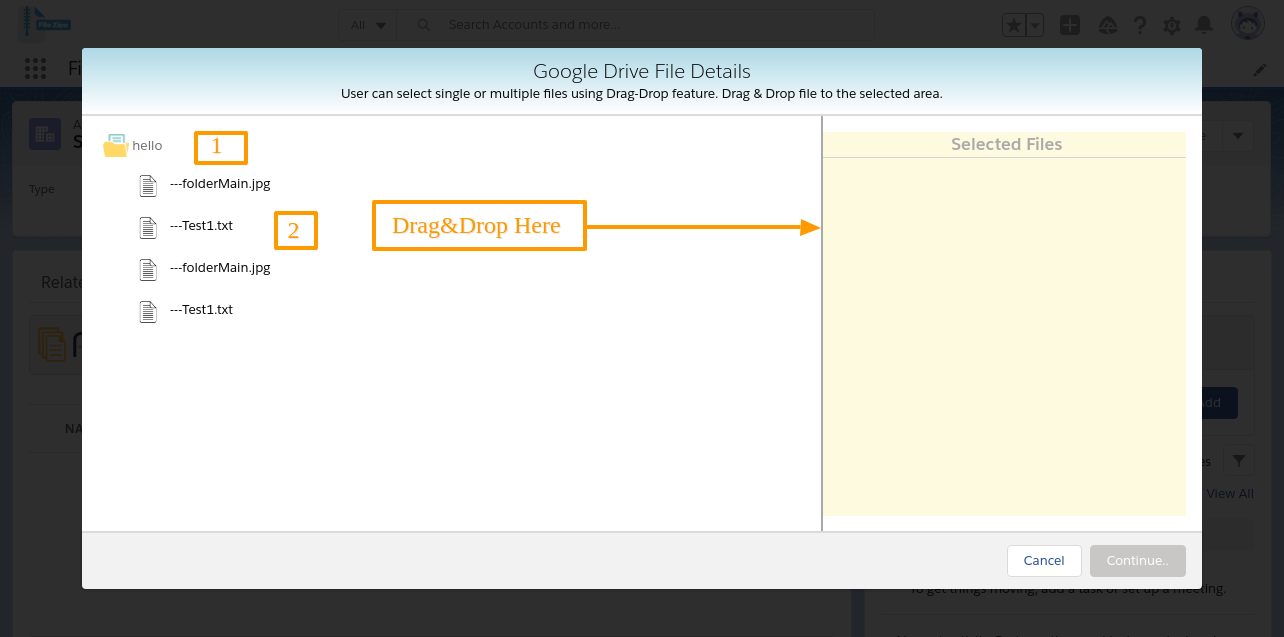
Above image has some features (each number has its description as below):
- Select the existing folder.
- User can easily “Drag & Drop” files to “Selected Files” section, like below image.

Step 9. Once the files from Google Drive is selected, Click on “Continue” button from above image and screen looks like below image. The Selected files (from Google Drive) are shown below:

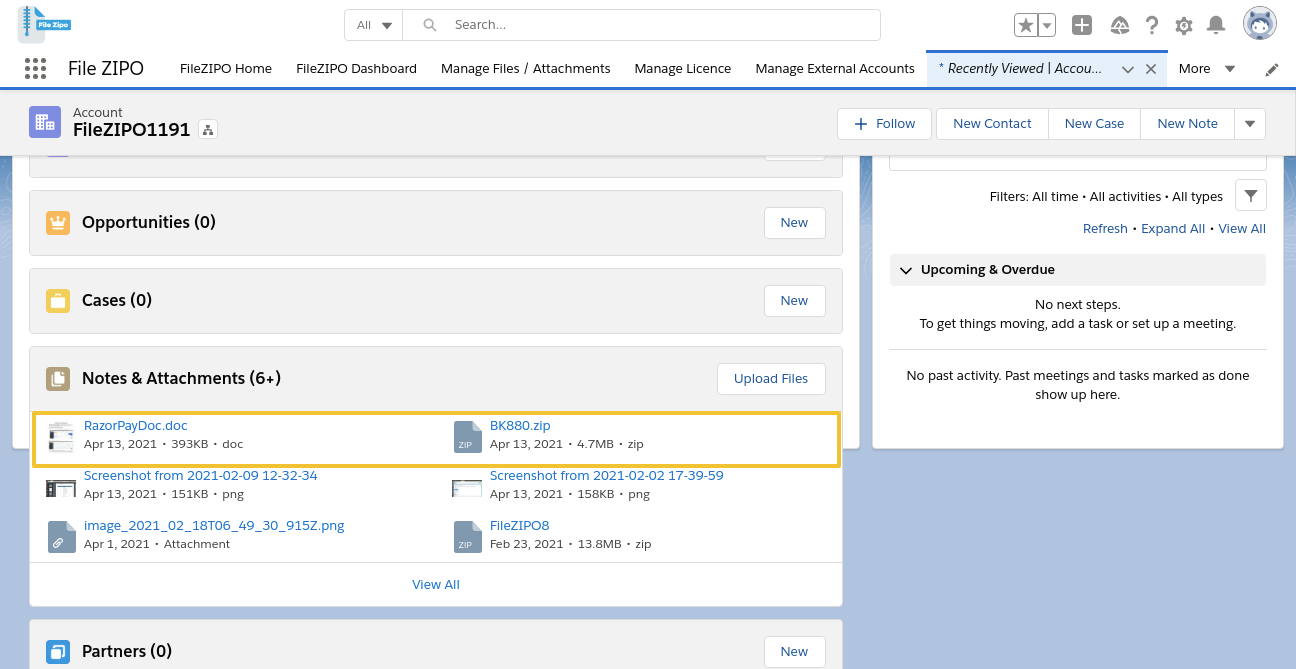
Click on “Save Files” Button and you are done. Go to record’s related tab and check the uploaded files in the Notes & Attachments or Files related list.
***************************************************************************************************
Have you started using FileZIPO yet? Get this revolutionary application and make your Salesforce file storage effortless and pocket-friendly. Click here to install the latest version of FileZIPO application in your Salesforce instance & explore its complete benefits for you.
For any queries or suggestions, you can contact us at https://filezipo.io/#contact or mail us: support@ayansoftwares.com. Our File ZIPO Expert will help you get the best out of it.
We appreciate your valuable inputs.
This tool is available on Appexchange and Click on below button to install the
latest version of File ZIPO
Our other Salesforce Product